
Time on site: 8 days | Area: 45m2
This project involved installing a 45m² engineered oak parquet floor in a period stone cottage in Street. Most of the eight days on site, however, went into preparing the subfloor before a single piece of wood was laid.
The starting point
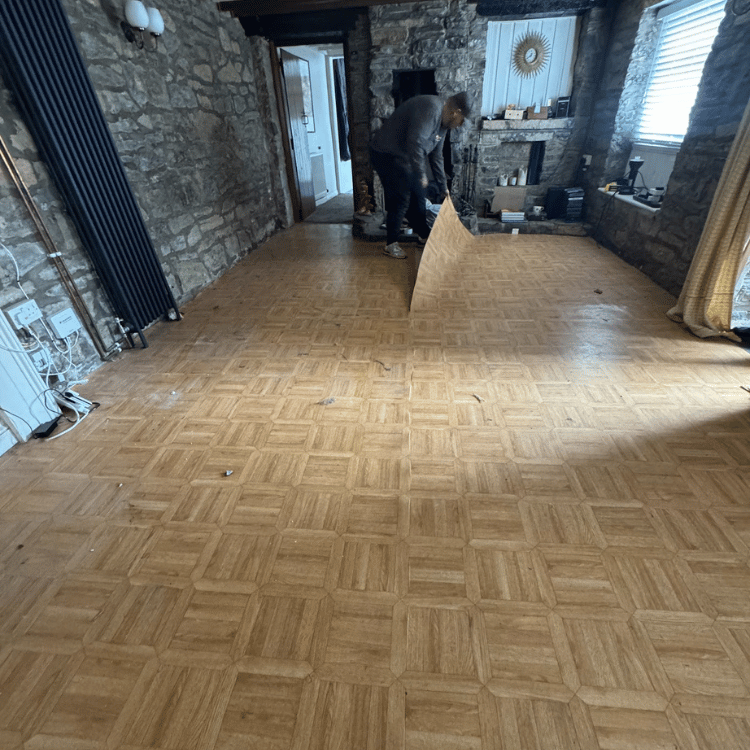
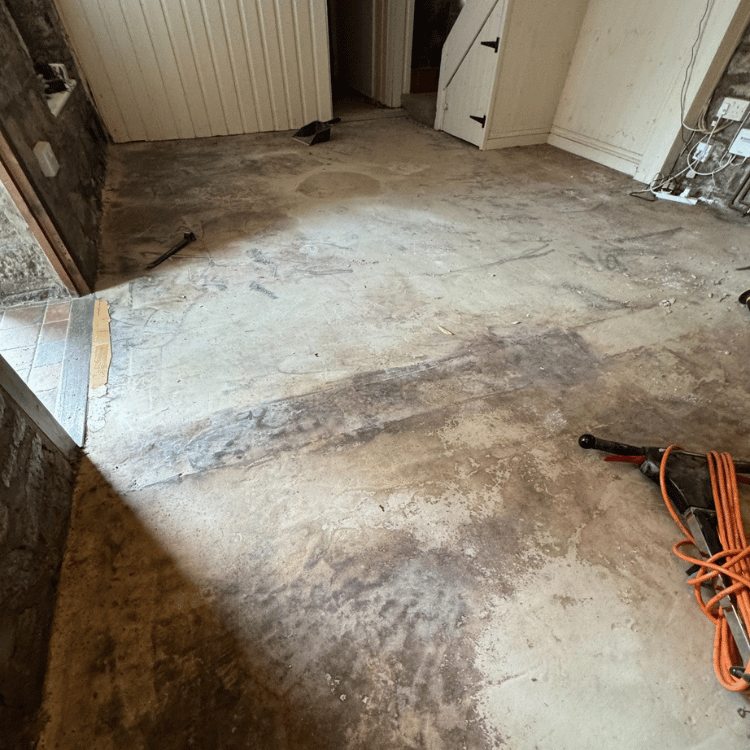
During the original site survey, we could tell something was not quite right, but the full picture only became clear once the old flooring was lifted. Beneath the vinyl and carpet was a damp concrete subfloor covered in old adhesive and paint residue, and it was clearly uneven. It is a good reminder that a survey can only reveal so much. Some problems only show themselves once the job is properly underway, and this one meant adapting as we went rather than simply following a fixed plan.
Sorting out the subfloor
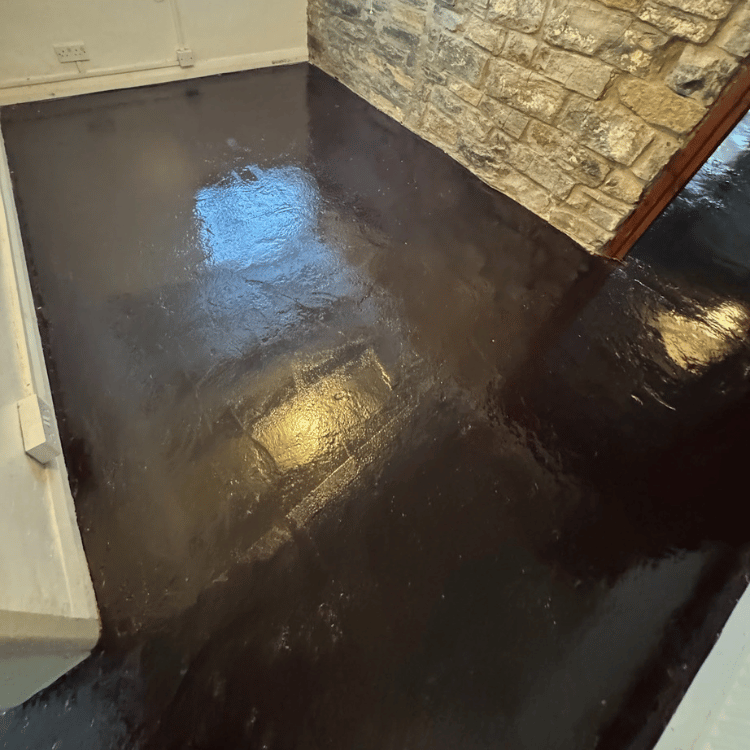
To get back to a clean, workable base, we brought in diamond grinding machines to mechanically remove the old adhesive and paint residue. This is not standard kit for every job, but it was necessary here given the condition of the subfloor. Once the surface was prepared, we applied a two-part epoxy damp proof membrane to deal with the damp in the concrete, then left it to cure fully overnight.
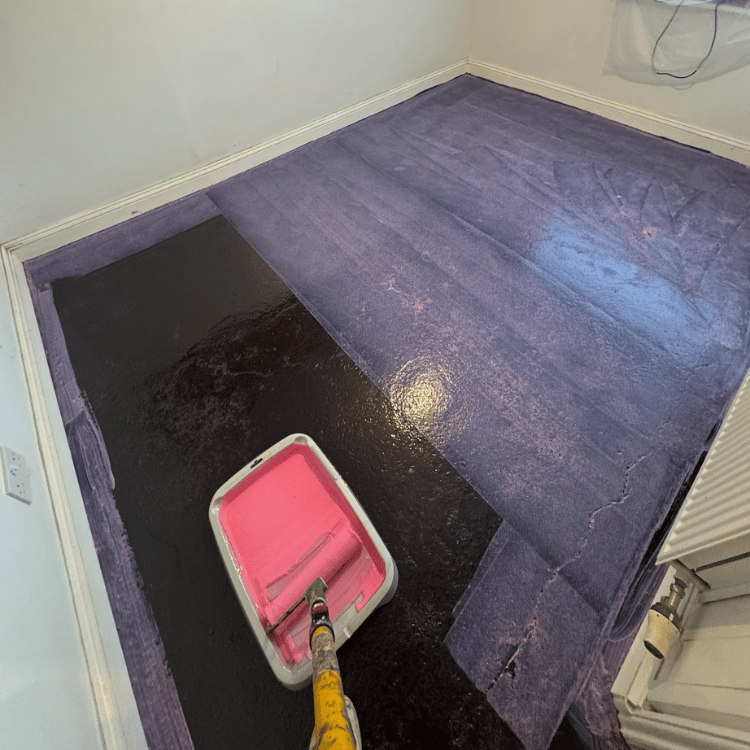
Once the membrane had cured, we applied a primer followed by a fibre-reinforced levelling compound to correct the uneven subfloor. We then left everything to dry over the weekend before the flooring itself was delivered. Rushing any of these stages would have risked compromising the finished floor, so the priority was making sure the base was properly sound before we went anywhere near the parquet.
Installing the parquet floor
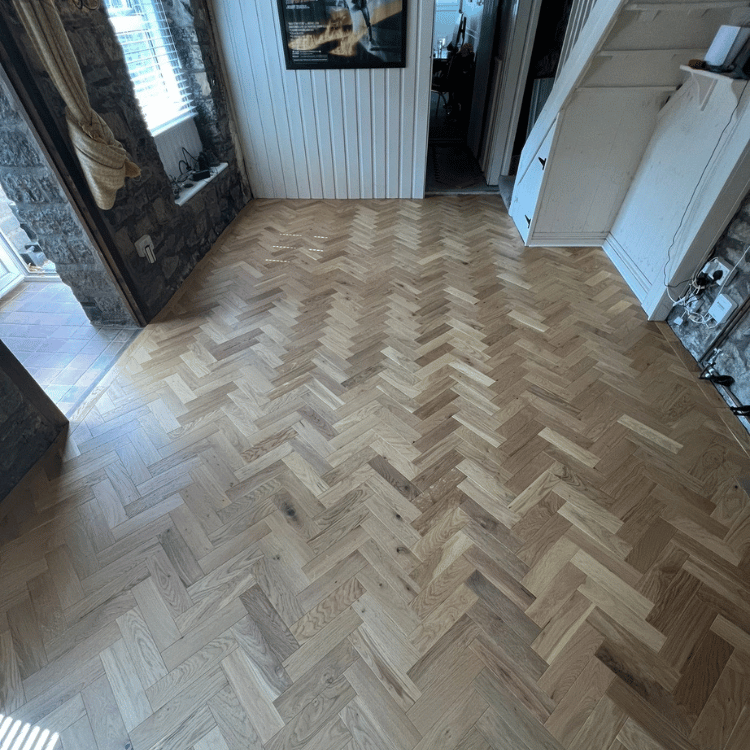
The client supplied an engineered oak parquet block, which we installed in a traditional herringbone pattern using the correct adhesive for the substrate. Around half of the room had skirting board; the rest was exposed original stone, so a single border detail would not have worked throughout. Where skirting was in place, we fitted a standard block border. Along the stone walls, the client asked us to scribe the wood directly to the uneven stone face rather than leave a straight gap, then finish the join neatly with a mastic bead. That took far more time and precision than a standard straight border, as no two sections of an old stone wall are ever quite the same shape.
The result
The finished herringbone floor now runs cleanly through the cottage, flat and stable despite everything that was hiding underneath. The scribed border against the exposed stone gives a bespoke, close fit that a standard straight border could not have achieved. Eight days is longer than a straightforward parquet installation would usually take, but the extra time went into making sure the floor had a proper base beneath it, rather than covering up issues that would only have caused problems later.
Thinking of installing parquet flooring in your home?
We have over 20 years experience installing parquet flooring in Street, Somerset, and the South West.
Contact us today for a free quote.
Thinking of upgrading your flooring to add value to your home? Read our guide on Why wood flooring adds value to your home.